Help
 Begin a Test
Demonstration Tests
- On the homepage, mouse-over Training Menu, click on Demonstration Tests.
- On the Select Test menu, use the +/- to expand/collapse the menu as you check for available tests to take by topic.
- Once the desired test is identified, click on the test name.
- Your test performance on up to the last five attempts for a selected test is then displayed under the Test-taking history of the selected test label on the right.
- Click
 to start the test.
- You will then be redirected to Test Information and Instruction page. Review the information and click
 at the bottom of that page to resume the test.
General Knowledge Tests
- On the homepage, mouse-over Training Menu, click on General Knowledge Tests.
- On the Select Test menu, use the +/- to expand/collapse the menu as you check for available tests to take by topic.
- An optional
 is available to show any untaken tests and tests with the latest attempt below 70% based on user history. The filter can also be used to locate any new tests added to the site.
- Once the desired test is identified, click on the test name.
- Your test performance on up to the last five attempts for a selected test is then displayed under the Test-taking history of the selected test label on the right.
- Click to start the test.
- You will then be redirected to Test Information and Instruction page. Review the information and click at the bottom of that page to resume the test.
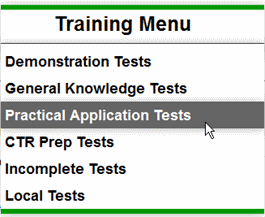
Practical Application Tests
- On the homepage, mouse-over Training Menu, click on Practical Application Tests.
- On the Select Test menu, use the +/- to expand/collapse the menu as you explore the menu for tests from different topics to take.
- An optional is available in the Select Test bar to show the tests required to earn continuing education (CE) credits, any untaken tests and tests with the latest attempt below 70% based on user history. The filter can also be used to locate any new tests added to the site.
- Once the desired test is identified, click on the test name.
- Your test performance on up to the last five attempts for a selected test is then displayed under the Test-taking history of the selected test label on the right.
- Click to start the test.
- You will then be redirected to Test Information and Instruction page. Review the information and click at the bottom of that page to resume the test.
CTR Prep Tests
- On the homepage, mouse-over Training Menu, click on Incomplete Tests.
- On the Select Test menu, use the +/- to expand/collapse the menu as you explore the menu for tests from different topics to take.
- An optional is available to show any untaken tests and tests with the latest attempt below 70% based on user history. The filter can also be used to locate any new tests added to the site.
- Once the desired test is identified, click on the test name.
- Your test performance on up to the last five attempts for a selected test is then displayed under the Test-taking history of the selected test label on the right.
- Click to start the test.
- You will then be redirected to Test Information and Instruction page. Review the information and click at the bottom of that page to resume the test.
Incomplete Tests
- On the homepage, mouse-over Training Menu, click on Incomplete Tests.
- The Select Test grid shows all the incomplete tests available to take.
- Locate the desired test and click to resume the incomplete test.
- To sort tests by user preference, click on one of the bolded column labels: Date Started, Training Area, Test and % Complete.
- You will then be redirected to Test Information and Instruction page. Review the information and click at the bottom of that page to resume the test.
Test Information and Instruction
- Clicking to start the test will redirect you to the Test Information and Instruction for the test you are about to take (or resume, if it is an incomplete test).
- Review the information and click at the bottom of that page to take the test.
- The test progress meter at the top also shows you the current status.

- To discontinue, click
 at the bottom of the page and no test data will be saved.
During a Test
Test Progress Meter
- The meter displayed below is always at the top of the page to show that the testing is in progress. You are no longer able to navigate using any hyperlinks on the webpage other than the links discussed in the section below. Doing so will end the test.

Viewing Test Information and Instructions
- The Test Information and Instructions section is hidden automatically when starting a test (i.e. when you click ).
- To view it again, click on
 to the right of
  label and expand the section. Click on the
  to close the section. Or click New Window in the label to open the section in a new browser window. Click on the
  in new browser window to close the section.
Viewing Case Scenario
- Each Practical Application test has a specific case scenario that is used with the coding form. The case scenario, used for a Case Coding test, summarizes the patient's cancer story that is fully documented in the patient's medical record.
- Click on
 located below the Test Information and Instructions section to open the scenario in a new window.

- If the scenario window is closed by mistake, click the case scenario link to open it again.
Answering in a Coding Test
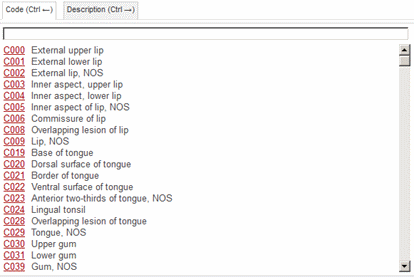
- Tests in Practical Application use a customized coding form for answer entry. Built-in lookup menus for data item descriptions and codes are present to simulate a coding environment commonly practiced in cancer registry abstracting/coding software.
- Click on either the lightbulb icon
 or use the Ctrl+L keyboard command to display the values in the lookup menu. After finding the appropriate code on the look-up menu, click on it, and the system will enter the code into the corresponding field on the coding form
  .
.
- The Site and Histology look-ups have search capabilities. After clicking on the lightbulb , search by code to verify the text for these data items or use an alpha look-up to find the code value needed. Select the code by clicking on the desired value. If you click anywhere on the screen outside the look-up menu before selecting a code, the look-up menu will automatically close.
Answering in a Multiple Choice Test
- Tests that are not Practical Application tests are conducted on a multiple choice form. Click the radio button to select the best answer for each question. When you click a different radio button, your answer will change.
Flagging a Question
- While the test is in progress, if you are uncertain about the original answer chosen for a multiple choice question, flag the question and return to it later.
- To flag a question, click
 above the question you intend to flag.
- To remove the flagging state, click
 above the question you have flagged.
- A filter can be used to show only the flagged questions quickly and hide the others. This filter is positioned to the right of the current question on the test. To use the filter, click on
 . Click Flagged questions. Click Apply.
-
Notes:
- Tests that are in Practical Application are not on a multiple choice form. Flagging a question is not available on a coding form.
- Flagged questions do not need to be unflagged before clicking the
 button in order to be scored. If there is an answer recorded, it will be evaluated for accuracy. If the question was not answered and left blank, it will be scored as incorrect.
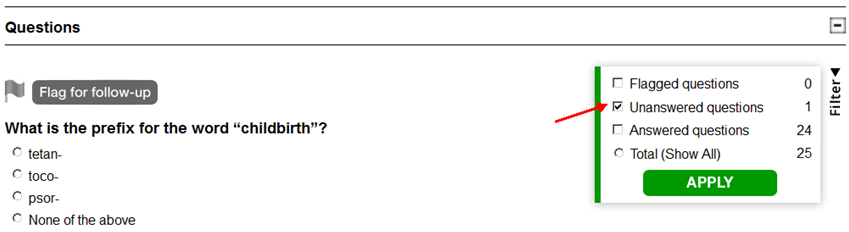
Filtering Answered and Unanswered Questions
- A filter can be used to show only unanswered or answered questions quickly and hide the others. This filter is positioned to the right of the current question on the test. To use the filter to find the unanswered questions, click on . Click Unanswered questions. Click Apply.
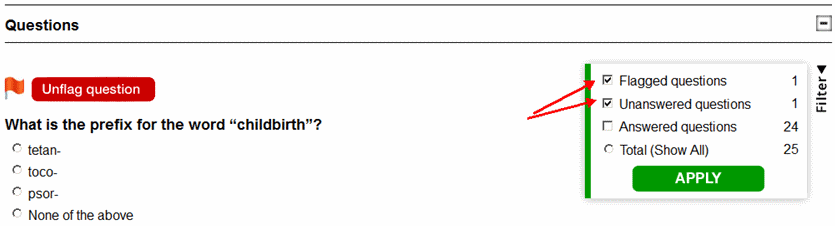
- Note: The filter accepts multiple selections. For instance, clicking both flagged questions and unanswered questions will display only the questions that are both flagged and have not been answered.
Ending a Test
- There are three ways to end a test. Click one of the three buttons located at the bottom of the testing page depending on how you want the system to record the test data.
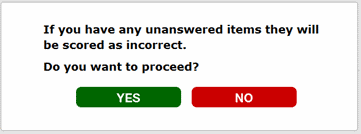
- will score the test. If there are any unanswered items, they will be scored as incorrect.
- After clicking a warning box displays. Click YES to go to the test results. Click No to stay on the Test Information and Instruction page (the test).
 will save the test data entered and mark the test as incomplete.
- After clicking a warning box displays. Click Yes to go the home page. Click No to stay on the Test Information and Instruction page (the test).
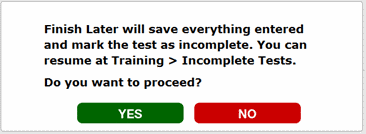
- At a later time when you want to return to a test, select the Training Menu dropdown and click on Incomplete Tests. A list will appear that includes all Incomplete Tests. Clicking will bring you to the Test Information and Instruction page. Click to return to the selected test.
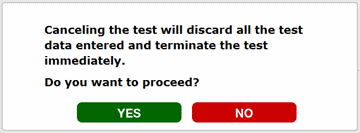
- will discard all the test data entered and terminate the test.
- After clicking a warning box displays. Click Yes to go the home page. Click No to stay on the Test Information and Instruction page (the test).
Scoring a Test
Viewing Results
- After clicking to score the test, the test results will be displayed.
- The Test progress meter at the top shows you the current status.

- Critical score, noncritical score, total score and their corresponding percentages are displayed followed by each of the questions (or data items in a coding form) answered. For more details on critical and noncritical score, see the section titled Understanding Critical and Noncritical Score.
- A green bar above a question (or data item) with the word
 indicates that the question below was answered correctly.
- A red bar above a question (or data item) with the word
 indicates that the question below was answered incorrectly.
- The question (or data item), your response, the correct answer and the rationale explaining the correct answer are provided for every question (or data item) in the test or exercise.
Printing Results
- Click the
 link in the Results bar to show the Results page in a new printer-friendly window.

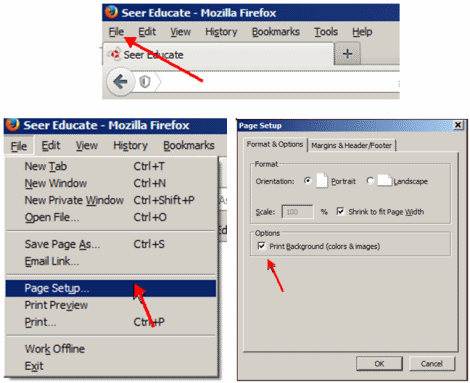
- To ensure proper printing, Firefox users must check that the option Print Background (colors & images) is set correctly. That option is located off the Firefox menu bar. Go to File > Page Setup and under Format & Options tab make sure there is a checkmark in that option box.
Understanding Critical and Noncritical Score
- Most coding exercises under Practical Application have fields designated as critical and, therefore, are assigned a point value higher than 1.
- Critical data items are generally those fields used to determine the site groups for incidence reporting, summary stage values, surgery to the primary site (released in the public use file) and class of case.
- The noncritical fields have a point value less than 1. Examples of these would be CS Mets (Bone, Brain, Liver, Lung), LVI, Chemo Date, Hormone Date, BRM Date, Other Rx, Other Rx Date, and Vital Status.
- Ideally, the percent for coding accuracy of the critical fields should be higher (or equal) to the percent for coding accuracy for all data items combined.
Filtering on Results
- A filter is positioned to the right of the critical/noncritical/total score and can be used to show just the questions (or data items) of interest to facilitate review.

- Click to select the filter desired and it will be applied to the questions (or data items) instantaneously.
- Here is an example to show how to select the questions (or data items) answered incorrectly.

- Note: The filter accepts multiple selections. This example shows how to select the questions (or data items) that are critical and were incorrect.

Accessing Previous Test Results
Viewing Test Results
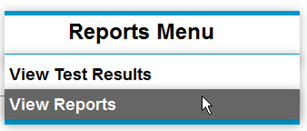
- On the homepage, mouse-over Reports Menu, click on View Test Results.
- The Select Test grid shows all the previously taken tests.
- Locate the desired test for reviewing results and click . You will then be redirected to the Test Results page.
- To sort tests by user preference, click on one of the bolded column labels: Date Taken, Training Area, Test and % Correct. The default displays the tests in reverse chronological order.

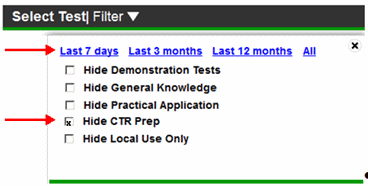
- Note: To reduce the number of tests displayed on the Select Test grid to facilitate locating a specific test to review, click on which is to the right of the Select Test label.

- The tests can be filtered based on when they were taken, and also which Training Area they belong to. Click on the desired filter and it will be applied to the Select Test grid instantaneously.
Generating Reports
Understanding the Various Reports
- Visit the View Reports page by selecting the Reports Menu > , then click Report Guide to see the description of all the available reports.
Running a Report
- From the homepage, mouse-over Reports Menu. Click on View Reports.
- Click on one of the report categories to expand.
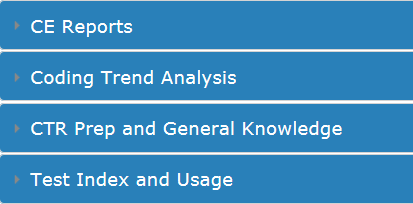
- Click on the name of the report to expand.

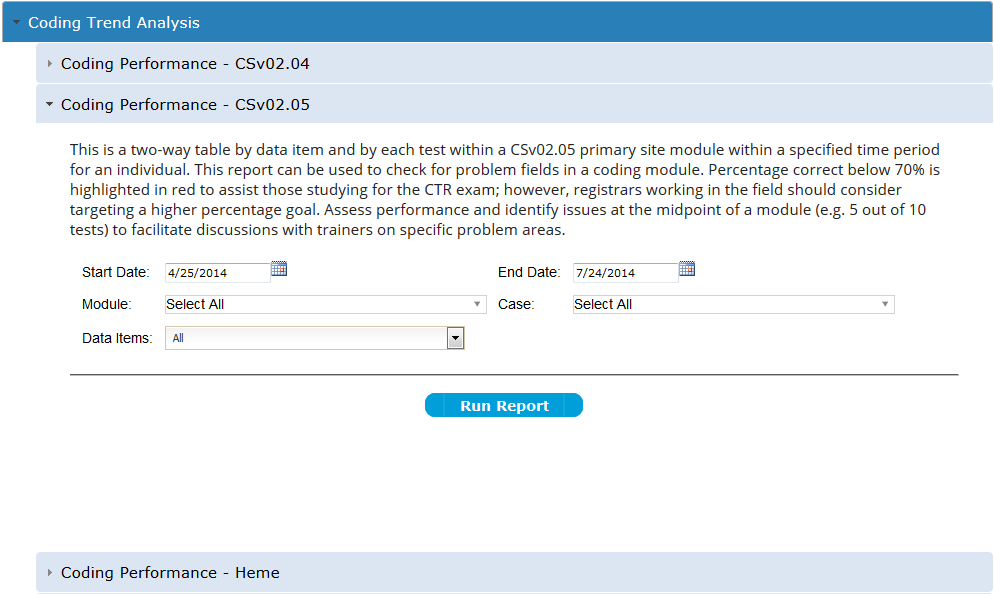
- On all the reports, default selections are already set, including the Start Date which is set for the past 90 days.
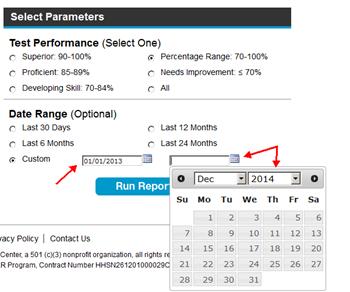
- Customize the report if needed by adjusting the available report parameters.
-
- The Start Date and End Date can be directly entered with the slashes or by clicking the Calendar icon.
- All the other report parameters can be changed through the dropdown selection.
- The report parameter, Case, is dependent upon the selection made in the Module. A module consists of cases. Module, a higher hierarchy, must be selected first before the correct selection of Cases can be made.
- All Coding Performance reports have an additional parameter, Data Item. Depending on the type of coding tests, there are several data items that are considered as critical (i.e., data items with point value higher than 1).
- When all the parameters have been set, click
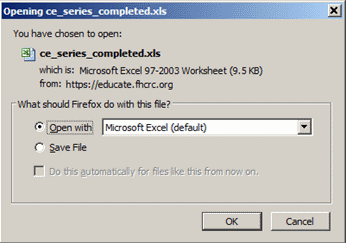
 . You will then be prompted to either Open or Save the report in an Excel application.
- In general, it takes between 10 to 90 seconds for a report to display. If after 90 seconds a prompt to open/save an Excel spreadsheet does not appear, please refresh the webpage, adjust the report parameters and click Run Report again. If the report still fails to run, use Contact Us to inform the SEER*Educate helpdesk of the problem.
- For Internet Explorer, Firefox and Chrome, refresh by pressing F5 or Ctrl+R.
Continuing Education (CE) Credits
CE-eligible Tests
- As of 09/01/2013, the 295 Case Coding CSv0204 tests have 147.5 CE eligible.
Identifying Remaining Tests to Earn CE Credits – A Selected Training Area
- On the homepage, mouse-over the Training Menu, click on Practical Application Tests.
- Click on and the Filter parameters appear in a small window.
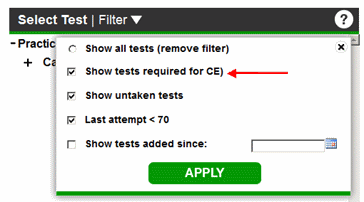
- Select Show tests required for CE. This will also automatically select the two choices, Show untaken tests and Last attempt <70% below, because those are the remaining tests that must be taken and have a score 70% or higher to qualify for CE credits.
- Click
 . The Select Test menu will refresh and the branches will begin in a collapsed state.

- Use the +/- to expand/collapse the menu as you explore the menu for tests from different series to take.
- Once the desired test is identified, click on the test name.
- Click to start the test.
- You will then be redirected to Test Information and Instruction page. Review the information and click at the bottom of that page to start the test.
Generating CE Certificate Report in case of an NCRA Audit
- The report, CE Certificate Listing - Completed Series, can be submitted to NCRA in case of an audit on the CE hours submitted. This report shows CE hours earned during a selected date range. Only fully completed series with every case or test meeting the 70% correct benchmark are listed on this report. NCRA will not grant partial credit for a series.
- To generate the report, on the homepage, mouse-over Reports Menu, click on View Reports.
- On the Select Report menu, click CE Certificate Listing – Completed Series.
- Select the Test Performance (Percentage Range 70-100%) and Custom Date Range parameters (Enter the dates for your CE reporting cycle).
- Click . You will then be prompted to either Open or Save in an Excel application.
- Close the report by clicking on the top X in the upper right hand corner of the report.
User Account Management
Changing password
- After logging in, click on your Username in the top right corner to visit your Account page.

- In the New Password field, enter your new password.
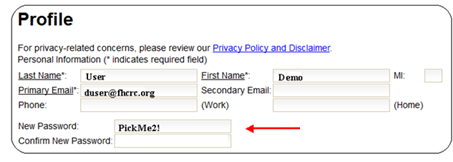
- In the Confirm New Password field, re-enter your new password.
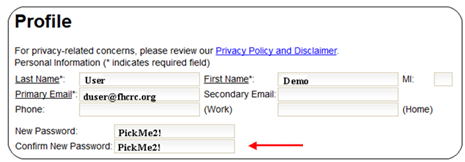
- Scroll to the bottom of the screen and click Save Personal Profile. Your password is now successfully changed.

Changing Primary Email
- The email you used to sign up for the SEER*Educate account can be changed. Maintaining your Primary Email address is essential as it is used for password reset and for notification about the availability of new training materials.
- After logging in, click on your Username in the top right corner to visit your Account page.
- In the Primary Email field, enter your new email address.
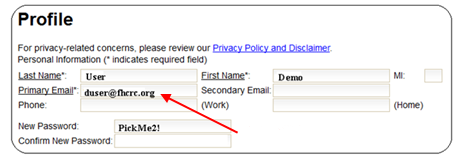
- Scroll to the bottom of the screen and click Save Personal Profile. Your primary email is now successfully changed.
Website Troubleshooting
Permanent Web Address
- The permanent web address for SEER*Educate is . Add this link to your browser favorites.
Supported Browsers
- Firefox, Chrome and Internet Explorer Versions 9*, 10 and 11 are supported by SEER*Educate.
- For instructions on installing Firefox on Windows, please visit here.
- For instructions on installing Chrome on Windows, please visit here.
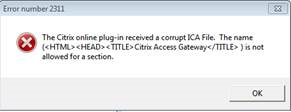
- *Note: Beta Testing Feedback from Users
- Our registry recently updated from IE 8 to IE 9 to prepare for SEER*Educate. A couple of our abstractors had issues with IE 9 and Citrix, receiving Error number 21311: The Citrix online plug-in received a corrupt ICA File. Our IT helpdesk decided to update us to IE 10, which resolved our Citrix issue.
The Website Looks Strange on Internet Explorer
-
Here are the two requirements for the proper content display on SEER*Educate using Internet Explorer:
- You must be using Internet Explorer (IE) version 9* or higher.
- Compatibility Mode in IE must be turned OFF.
- The default version of Internet Explorer that is installed in Windows 7 is version 8.
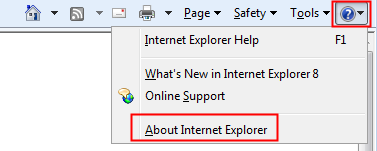
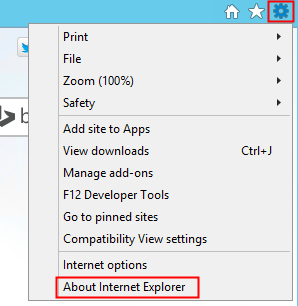
- If you are unsure of which version of Internet Explorer you are using you can look in the About Internet Explorer:
- The image on the right shows the proper content display of the SEER*Educate homepage, https://educate.fredhutch.org/. However, if the Compatibility View in IE is ON, the content will not be displayed properly, with web items shifted to the left, as shown in the image on the left below.

- You can also tell whether Compatibility View is turned ON or OFF by the state of the compatibility view symbol in the address bar. For proper display, it must be turned off.
-
ON:

-
OFF:

- To turn OFF Compatibility View just left click on the blue icon.
- If you don't see the Compatibility View icon in the address bar, click on the Tools menu and UNCHECK Compatibility View. If you don’t see the menu bar, press ALT on your keyboard to display the menu bar.

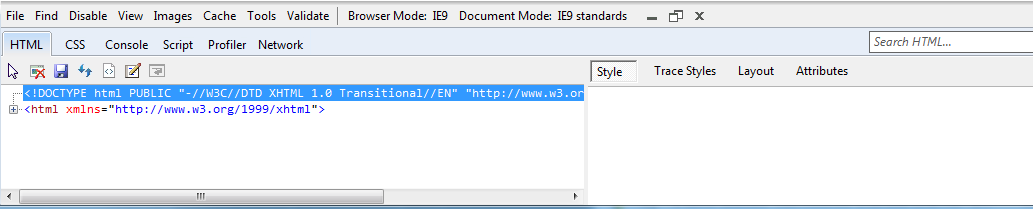
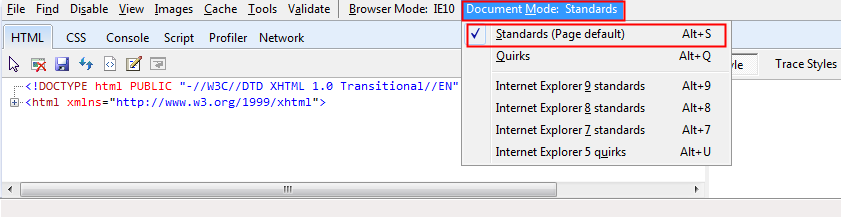
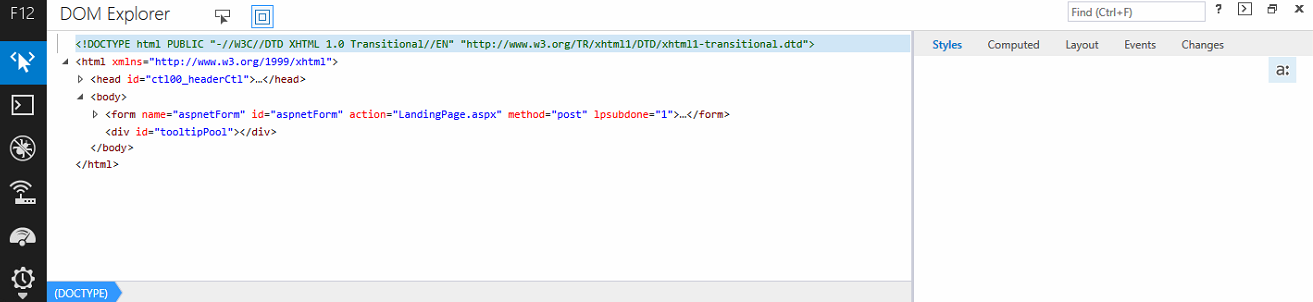
- If after going through all the steps above and you are still experiencing improper display of web content, check the Document Mode of the Internet Explorer.
- Press the F12 key and a window at the bottom of Internet Explorer should appear.
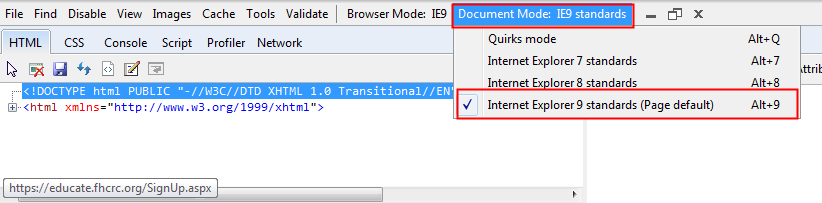
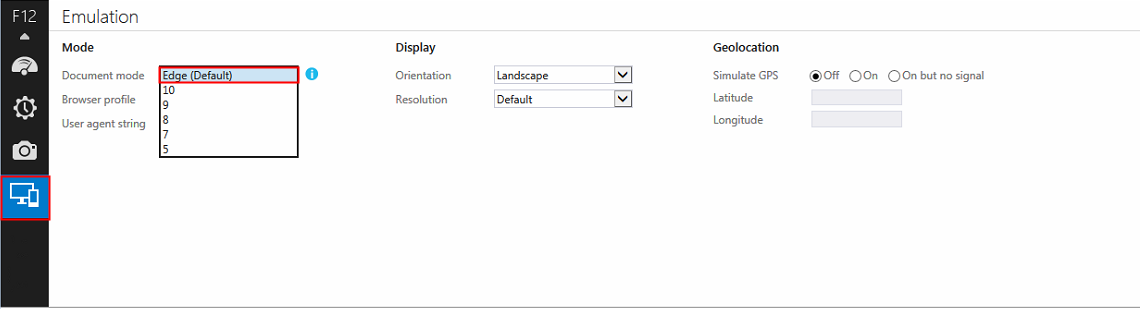
- Select Document Mode from the Menu and verify that the correct mode is selected.
- Version 9
- Version 10

- Version 11
- Scroll down the left bar to the last icon:
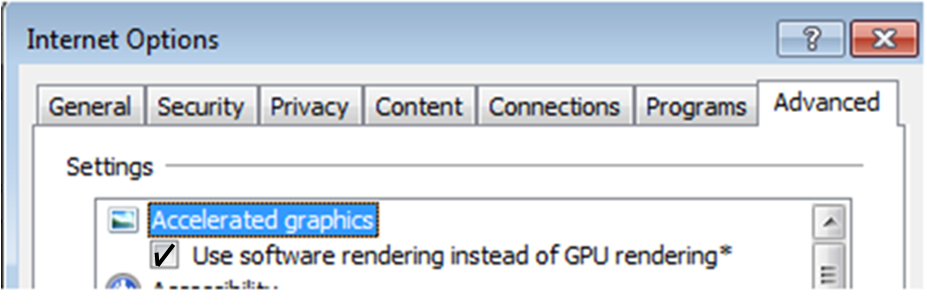
- We also received numerous support requests in June 2014 concerning the strange display of our landing page with the video covering the login prompt when using Internet Explorer, as depicted in the screenshot below.
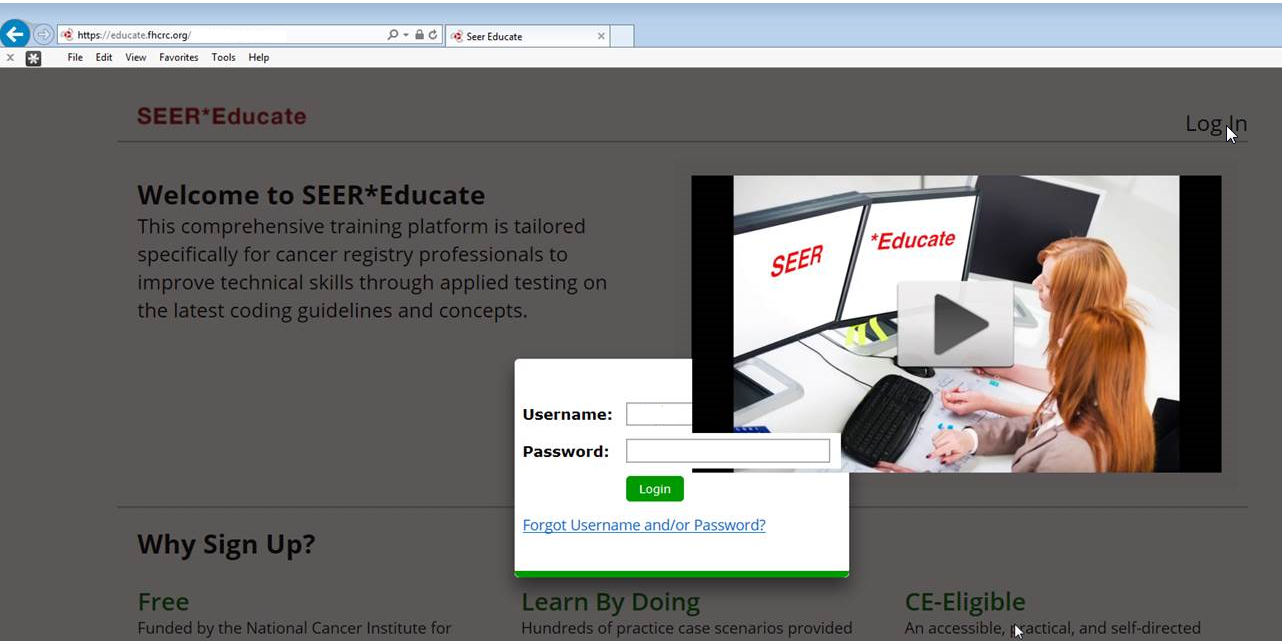
- The solution is simple. Go into Internet Options. Under the Advanced tab, make sure the following box is checked. The Internet Options can be accessed under the Tools menu.

- *Note: Beta Testing Feedback from Users
- Our registry recently updated from IE 8 to IE 9 to prepare for SEER*Educate. A couple of our abstractors had issues with IE 9 and Citrix, receiving Error number 21311: The Citrix online plug-in received a corrupt ICA File. Our IT helpdesk decided to update us to IE 10, which resolved our Citrix issue.
Videos Failed to Play
- Videos used throughout the website require Adobe Flash for proper content display.
- If the error message is asking you to install Adobe Flash, please visit http://get.adobe.com/flashplayer and follow the instructions provided on the Adobe website for properly installing Adobe Flash.
- If the error message is saying Adobe Flash has crashed, please try the following two solutions:
- 1. Log out of Educate (if you are already logged in) and restart the browser.
- 2. If the first solution does not resolve the issue, follow the instructions provided on the Adobe website at http://forums.adobe.com/thread/977699 for properly clearing Flash Player cache.
Clearing Browser Cache to Ensure the Latest Version of the Application and its Content is Available
- Updates to training content are released every quarter; and new website features are released on a regular basis as improvements are continually being made to enhance user experience. It is recommended that your browser cache be cleared regularly to ensure the latest website features are available on your browser.
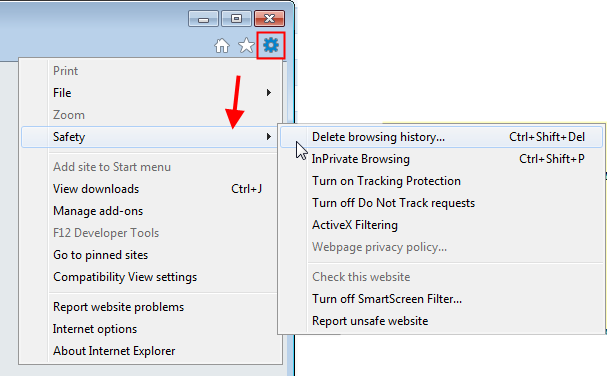
- Internet Explorer
- Visit http://windows.microsoft.com/en-us/internet-explorer/manage-delete-browsing-history-internet-explorer#ie=ie-11.
- Choose the correct IE version:
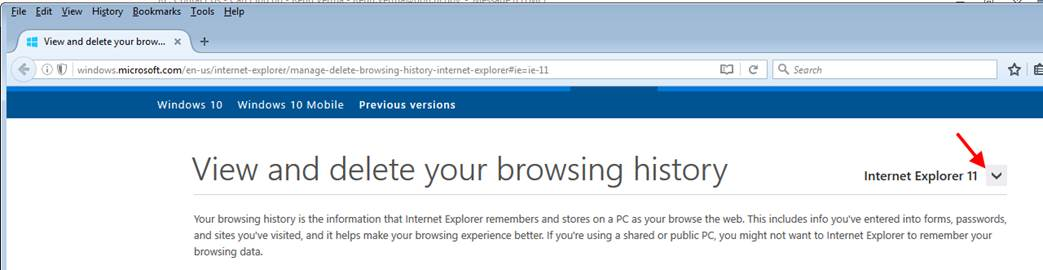
- Scroll to the middle of the page and look for To delete your browsing history in the desktop. Click and reveal the instructions to bring up the Browsing History window.
- Using IE 11 for illustration below, bring up the Browsing History window.
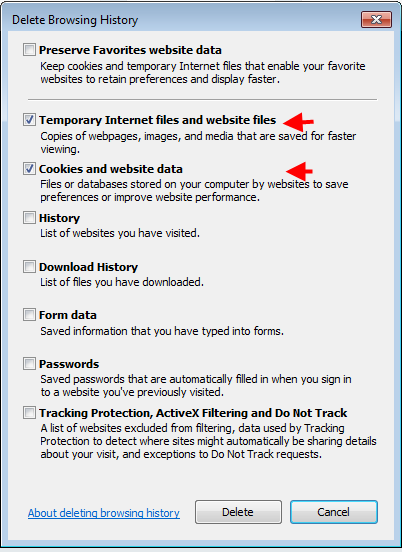
- The following two boxes must be checked for the browser cache to be cleared. Click Delete.
- Firefox
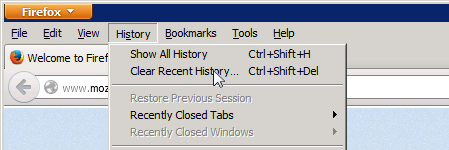
- Depending on your Firefox version, the screens and the steps may differ. If necessary, contact your IT department for assistance. To clear browser cache for Mozilla Firefox, click History in the top menu bar and then click Clear Recent History.
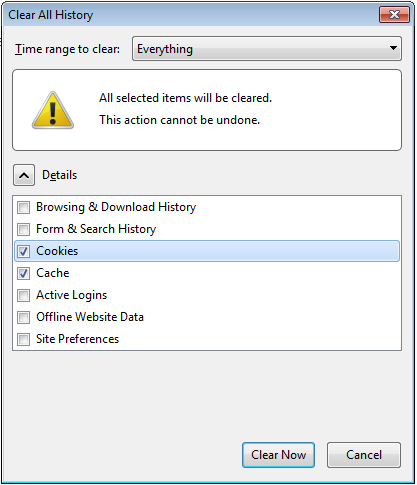
- Change the Time range to clear to Everything.
- The following two boxes must be checked for the browser cache to be cleared. Click Clean Now.
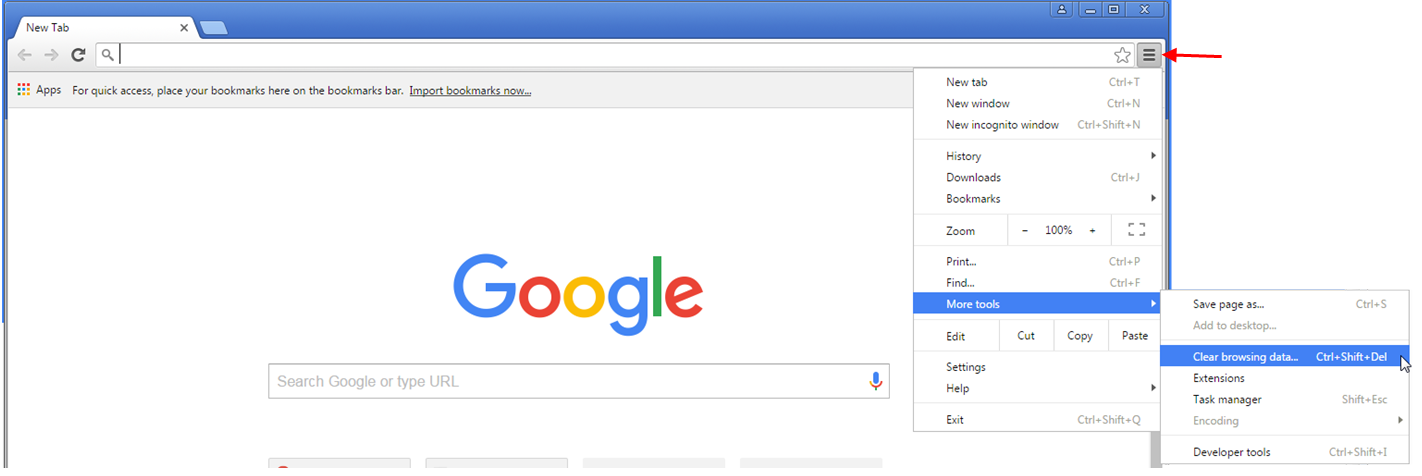
- Google Chrome
- For step-by-step instructions, visit https://support.google.com/chrome/answer/95582?hl=en.
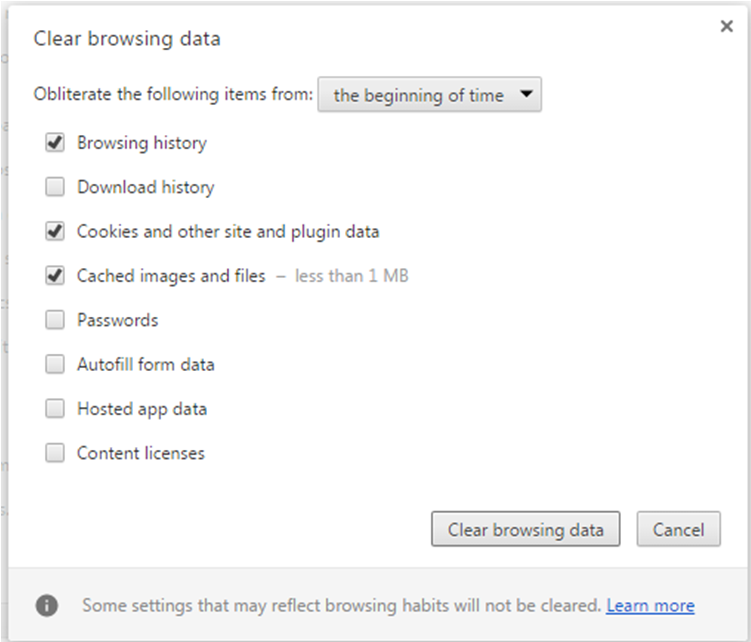
- The following three boxes must be checked for the browser cache to be cleared. Click Clear browsing data.
Needing Further Assistance
Contact Us
- If you have encountered issues that cannot be resolved with the Help topics; or if you have any ideas to help improve SEER*Educate, tell us.
- Click the link located in the website footer.
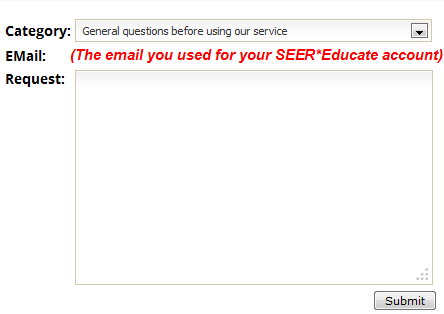
- Select the Category of your request.
- The email you used for your SEER*Educate account will be automatically populated. It most likely is the initial email you used during initial sign-up. To change the email for your SEER*Educate account, review the related Help topic under User Account Management > Changing Primary Email.
- Enter your request in the space provided and click Submit. We appreciate your feedback.
- While we believe we have recorded the best answer for all fields under Practical Application tests, we recognize that others might believe a different answer is a better choice. We will track the responses for all data items. For data items with less than 85% agreement with the preferred answer, the CTR panel will review the case scenario again and will update the answers if appropriate. When necessary, the panel will also contact the appropriate standard setter and request that existing documentation be clarified to improve coding consistency.